 Amanda Waller
Perfect hard-boiled eggs take exactly 11 minutes in boiling water, followed by an immediate ice bath to stop the cooking and make peeling effortless. That’s the method professional cooks rely on, and it works every single time, whether you’re prepping a week’s worth of protein-packed snacks for your kids’ lunchboxes or preparing ingredients for a classroom nutrition project.
Hard-boiled eggs are a powerhouse ingredient for busy families. They’re inexpensive, packed with 6 grams of protein each, and just as satisfying alongside school breakfast as they are tucked into an afternoon snack. But here’s what stops so many people: the fear of green-tinged yolks, rubbery whites, or shells that refuse to budge. Those problems aren’t about luck. They’re about timing and temperature.
When Maria, a mom of three in our Summer School Health community, first tried the 11-minute method, she couldn’t believe how simple it was. She’d been overcooking eggs for years, ending up with that chalky yolk texture her kids refused to eat. Now she batch-cooks a dozen every Sunday evening, and her family goes through them by Wednesday.
This guide walks you through the exact steps, the tools you need, and how to know when your eggs are perfectly done.
Why Hard Boiled Eggs Belong in Your Family’s Routine
Picture this: it’s 7:15 on a Tuesday morning, and you’re assembling lunch boxes while refereeing a debate about mismatched socks. You open the fridge and spot a container of hard boiled eggs you prepped on Sunday. Two minutes later, three protein-packed lunches are ready to go. That’s the magic of keeping cooked eggs on hand.
Hard boiled eggs deliver six grams of protein each, along with vitamins D, B12, and choline that growing kids need. Unlike many protein sources, they need no reheating, no special containers, and no worry about staying cold until lunch. Peel one for a toddler’s breakfast, slice another onto a salad, or send them whole in a lunchbox with a sprinkle of salt. They work at every meal and every age.
This convenience aligns perfectly with what we see in the Nourished Program: families need practical strategies that fit real life, not aspirational meal plans that fall apart by Wednesday. When you cook a batch of six eggs in 11 minutes, you’re not just making breakfast. You’re creating options for the whole week, grab-and-go snacks after school, quick protein to round out a lunch that’s mostly crackers and fruit, or a backup when dinner plans go sideways. One simple skill removes multiple daily decisions, and that matters when you’re trying to keep everyone fed well without burning out.
What You’ll Need to Get Started
You’re already equipped to make perfect hard boiled eggs, no special gadgets required. This recipe calls for six eggs and relies on items you already have in your kitchen drawer and cupboard.
Here’s what you’ll gather before you start:
- 6 eggs (straight from the fridge is fine)
- A pot large enough to hold the eggs in a single layer
- A lid that fits your pot
- Cold tap water
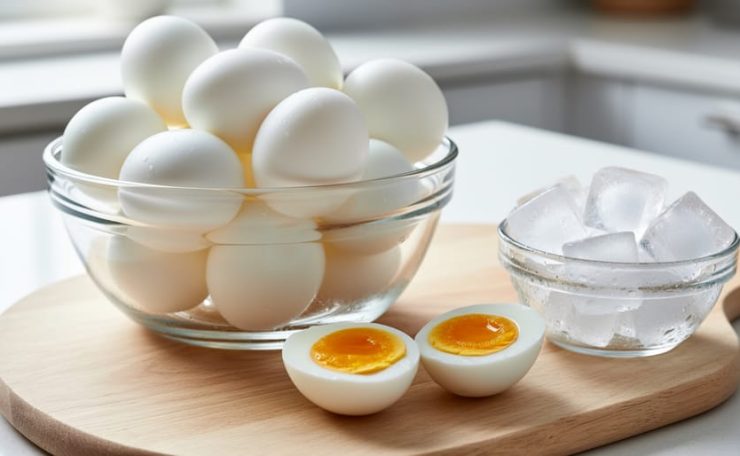
- Ice cubes (about a tray’s worth)
- A bowl for the ice bath
- A timer (your phone works great)
That’s it. No thermometer, no egg cooker, no fancy tools. If you can boil water, you can do this. The beauty of this method is that it meets you right where you are, whether you’re prepping lunches at dawn or teaching a group of kids basic cooking skills. Just pull these simple items together, and you’re ready to start.
Important Safety Notes Before You Begin
Keeping your family safe starts with knowing the basics. When you’re cooking eggs for your kids’ lunches or breakfast, the golden rule is simple: both the yolk and the white need to be completely firm. This isn’t about perfection, it’s about making sure everyone at your table stays healthy and happy.
The good news? Following the 11-minute method in this guide gets you there every time. Just like hitting the right cooking temp for chicken matters, making sure you cook eggs until firm protects your family from potential bacteria. Once your eggs are cooked and cooled, store them in the refrigerator within two hours. They’ll keep safely for up to one week in their shells, ready whenever you need a quick protein boost for packed lunches or after-school snacks.
Step-by-Step: The 11-Minute Method
Step 1: Start with Cold Water
Place your eggs in a pot in a single layer, no stacking, and add enough cold water to cover them by about an inch. Starting with cold water is the key to even cooking. When eggs go straight into boiling water, the outside cooks too fast while the inside lags behind, which leads to rubbery whites and that frustrating green ring around the yolk. Cold water lets the eggs heat up gradually, so the whites and yolks firm up at the same pace. Think of it like waking up gently instead of jumping out of bed when the alarm goes off. This simple step sets you up for success from the start.
Step 2: Bring to a Boil
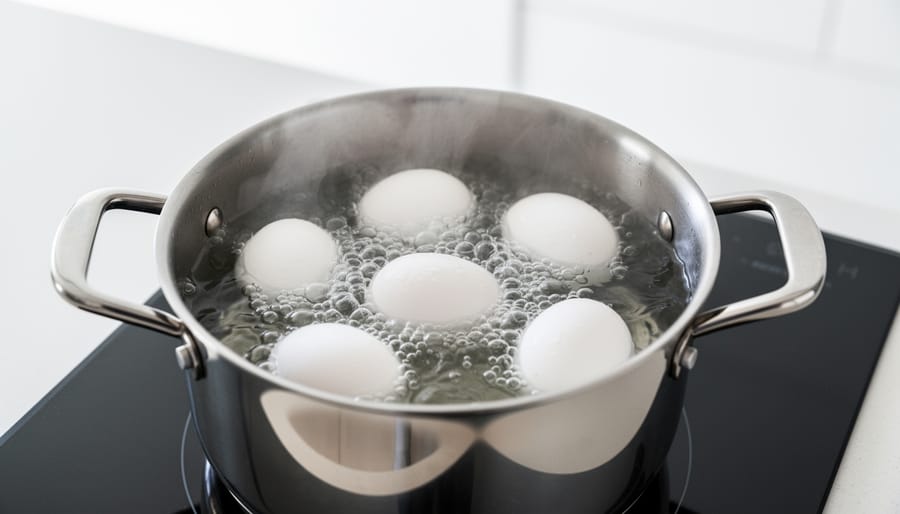
Place your pot on the stove and turn the heat to high. You’re looking for a rolling boil, big, vigorous bubbles breaking the surface all over, not just a few gentle ones around the edges. This usually takes five to seven minutes, depending on your stove and how much water you used.
Keep an eye on the pot as it heats up. You’ll see the water start to shimmer, then small bubbles will form on the bottom and sides of the pan. When those bubbles rise quickly and the whole surface is moving, you’ve got your rolling boil. That’s your cue to move on to the next step right away, don’t let it boil for long, or you’ll start cooking the eggs while the water’s still on the heat, which throws off our 11-minute timing.
Step 3: Off the Heat
Once the water reaches a rolling boil, immediately remove the pan from the heat and cover it with a lid. This is where the magic happens, the residual heat in the water will gently finish cooking your eggs without making them rubbery or causing that greenish ring around the yolk. Set your timer for 11 minutes if you want hard boiled eggs with firm yolks (the kind that slice neatly for salads and sandwiches), or 6 minutes if you prefer soft boiled eggs with creamy, jammy centers.
Don’t peek during this time. Keep that lid on and let the hot water do its work. The covered environment traps steam and maintains the temperature, cooking the eggs through evenly from edge to center. If you’re worried about losing track of time, this is when that kitchen timer really earns its keep, those minutes matter for perfect results every time.
Step 4: Ice Bath Time
Use a slotted spoon or tongs to lift each egg out of the hot water and gently place it into your prepared ice bath, that’s just a bowl filled with cold water and plenty of ice cubes. Let the eggs sit there for a full 10 minutes while you clean up or get the kids ready for school. This cooling step does two important jobs: it stops the cooking process so your yolks stay bright yellow instead of turning that grayish-green color, and it makes peeling so much easier by helping the membrane separate from the shell. Think of it as giving your eggs a cold plunge after their hot bath. If you’re packing these for lunch boxes or meal prep, the ice bath also brings them down to a safe temperature for the fridge quickly, which busy parents appreciate on hectic mornings.
Step 5: Peel and Enjoy
After the 10-minute ice bath, your eggs are ready to peel. Start by gently tapping each egg on the counter to crack the shell all around, think of it like creating a road map of tiny cracks. Then roll the egg lightly under your palm to loosen the shell further. Peel under cool running water if you can; the water helps lift stubborn bits of membrane away from the smooth white underneath.
When you’ve followed the method exactly, cold start, 11 minutes off heat, ice bath, the shell should slip off in large pieces instead of clinging in frustrating little fragments. You’ll know you’ve done it right when the peeling feels easy, almost satisfying, and you’re left with a smooth egg ready to slice, halve, or pop straight into a lunchbox. If a bit of white comes away with the shell, don’t worry, it still tastes just as good and provides the same protein punch your family needs.
How to Tell Your Eggs Are Done Right
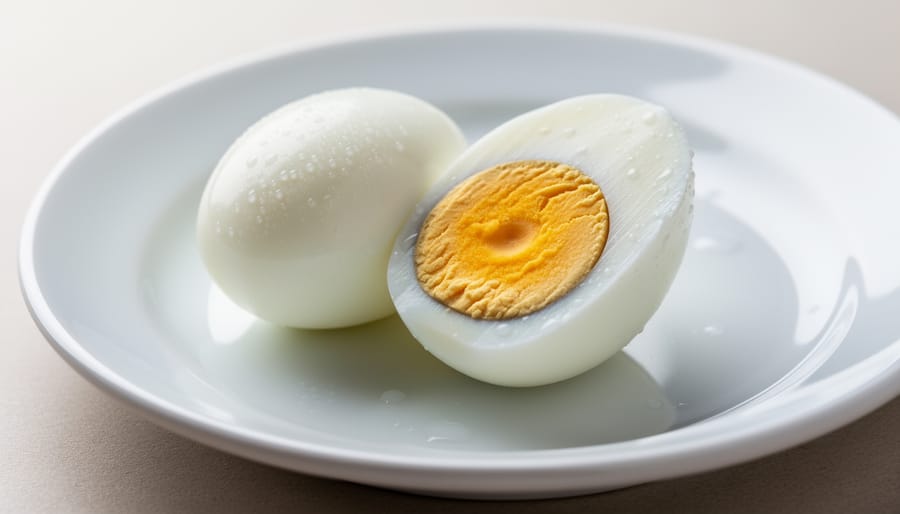
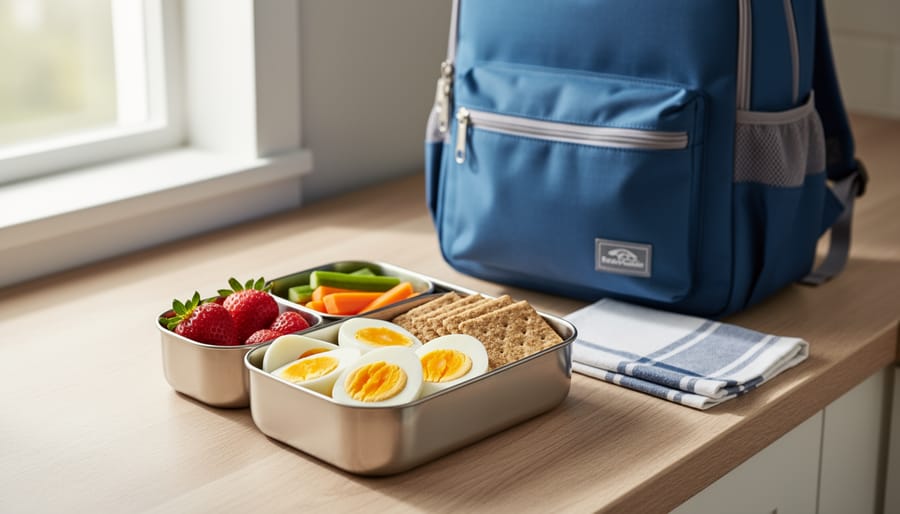
The best way to know your eggs are cooked just right is to cut one open and take a look. You’re aiming for a firm, fully-set yolk with no dark ring around the edge and a white that’s tender but not rubbery. If you’ve followed the 11-minute method, you should see a yolk that’s pale yellow all the way through and a white that holds its shape without any translucent or runny patches.
Here’s what a perfectly cooked hard boiled egg looks like:
- Yolk is firm and pale yellow, not crumbly or chalky
- No gray or green ring around the yolk (a sign of overcooking)
- White is opaque and fully set, with a smooth texture
- Egg holds its shape when sliced and doesn’t fall apart
If you slice into an egg and the yolk is still a bit soft or dark in the center, don’t worry. Just pop the remaining eggs back into hot water for another minute or two, then return them to the ice bath. On the flip side, if you see that telltale gray-green ring, your eggs cooked a bit too long. They’re still safe to eat and perfectly fine for lunches or snacks, though the texture might be slightly firmer than ideal. Next time, try reducing the standing time by a minute or making sure your ice bath is ready right at the 11-minute mark.
The great news is that even if your first batch isn’t picture-perfect, you’re building a skill that gets easier every time. Each round teaches you how your stove and pot work together, and soon you’ll be turning out consistent results without a second thought.
Next Steps: Putting Your Hard Boiled Eggs to Work
Now that you’ve mastered the 11-minute method, you’ve got a kitchen superpower that opens doors to dozens of quick, healthy meals. Hard boiled eggs are one of the most versatile ingredients in your family’s nutrition toolkit.
Slice them onto whole-grain toast with avocado for breakfast. Tuck them into lunch boxes with carrot sticks and hummus, they stay fresh all morning without refrigeration. Chop them into grain bowls, green salads, or pasta salads for dinners that come together in minutes. Kids can help peel and mash them for egg salad sandwiches, turning cooking into a shared activity that builds confidence.
Maria, a third-grade teacher who coordinates school lunch programs, told us she prepares two dozen eggs every Sunday night. “I keep them in the fridge and add one to each child’s lunch throughout the week,” she explained. “Parents tell me their kids actually eat the protein now because eggs are familiar and easy to handle. It’s become our go-to solution for picky eaters.” Her students have started asking for “egg days” because they know what to expect and feel proud they can peel them independently.
Think of hard boiled eggs as your meal prep anchor. Make a batch on Sunday and you’ve got ready-to-eat protein for five days of snacks, sandwiches, and side dishes. They fit perfectly into Summer School Health’s mission of nourishing kids with real food that doesn’t require fancy equipment or complicated recipes, just a pot, a timer, and the confidence to get started.
Your Questions Answered
How long do hard boiled eggs last in the fridge?
Properly cooked and refrigerated hard boiled eggs stay fresh for up to one week. Store them in their shells for best quality, or peel and keep them in a covered container. This makes them perfect for meal prep and helps you make meals last longer throughout your busy week.
Can I cook more than 6 eggs at once?
Yes, you can cook as many eggs as fit comfortably in a single layer in your pot. Just make sure they’re covered by about an inch of cold water and have room to move slightly. The 11-minute timing stays the same regardless of batch size.
What if I don’t have ice for the ice bath?
Run the eggs under very cold tap water for several minutes, changing the water frequently to keep it cold. While not quite as effective as an ice bath, it will still stop the cooking and make peeling easier. You can also refrigerate them right after cooling under the tap.
Why do some eggs crack during cooking?
Cracks usually happen when eggs go from cold to boiling water too quickly. Starting with cold water and bringing everything to a boil together prevents this shock. Older eggs also tend to crack less than very fresh ones, and they peel more easily too.
These answers reflect what parents and educators have found works in real kitchens, not just test conditions. Once you master this simple method, hard boiled eggs become a reliable tool for building healthy eating habits with your family. They’re ready when you need them, they travel well in lunch boxes, and kids can help make them once they understand the process.
You’ve just mastered a skill that’ll serve your family for years to come. That pot of perfectly cooked eggs sitting in your kitchen right now? It’s more than breakfast, it’s proof that healthy eating doesn’t have to be complicated or time-consuming. Every hard boiled egg you pack in a lunchbox or slice onto a salad is a small, powerful choice toward better nutrition for the people you care about.
We’d love to hear how this method worked for you. Did your kids notice the difference? Did meal prep get a little easier this week? Share your wins with the Summer School Health community, your story might be exactly the encouragement another parent needs to take that first step.
Ready to keep building momentum? Explore our collection of simple, nutritious recipes and family wellness resources designed for real life, not perfection. Whether you’re planning school lunches or looking for more kid-friendly protein ideas, we’re here to support you every step of the way. Here’s to healthier habits, one egg at a time.